Taking a screenshot on an iPad
- Pull up whatever you want to take a screenshot of on your iPad screen.
- Press your home button (the round plastic one on the face of the iPad) and the sleep/wake button (the one on the top of the iPad) simultaneously.
- The screen will flash, and an image will be saved to your Camera Roll.
Taking a screenshot on a Mac
- Pull up whatever you want to take a screenshot of on your screen.
- While holding down your command (⌘) key and your shift key, tap the number 4 on your keyboard.
- A crosshair appears on the screen. Click and drag from one corner of the area you want to screenshot to another. This will save an image on your desktop.
Taking a screenshot on a PC
- Pull up whatever you want to take a screenshot of on your screen.
- Click "Start," and type "snip" into the search bar at the bottom of your window.
- In the search results, choose "Snipping Tool." The icon looks like this:

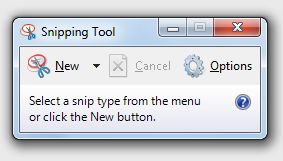
- The following tiny window will open. In it, click the "New" button.

- A crosshair appears on the screen. Click and drag from one corner of the area you want to capture to another.
- This will open a window with the area you selected shown. Click the purple floppy disk icon in the top left.

- In the save window that opens, make sure to save your image someplace where you'll be able to find it easily later.
 |
 |
 |
0 Comments