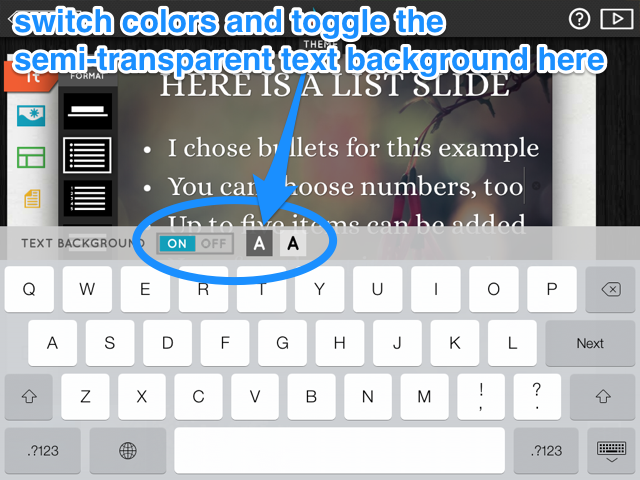
Heading to the Tt icon on the left side of the app will allow you to choose which type of text you’d like to have on your slide:
- a header and sub-header,
- a numbered list,
- a bulleted list,
- multiple lines of text,
- a centered slide with a logo on it, or
- a split slide with text on a solid background and an image.
To see examples of the different slide types, and to learn how to easily switch between them and adjust their layouts, check out this video:
Logo Slides
Once you've chosen the logo slide type under the Tt tool, just click or tap the circular area with the camera icon on the slide. A popup will appear for you to import your logo. Resizing and cropping is not available for this feature, so be sure to use a logo file that's already formatted for use. The best dimensions for a logo would be between 300x300 and 600x600 (higher dimensions are more important for retina iPads).
You can then set a solid or photo background behind the logo and text from your background tool, and arrange your text and logo in different ways in the layouts tool.
Sidebar Slides
If you've selected the sidebar slide type, you can set the color behind your text from the backgrounds tool under the solid colors tab, then choose the photo tab in the same area to accompany your text. The layouts tool is where you'll be able to choose how much text occupies the slide, and how it's arranged.
Lists
As you finish each line, you have the option to continue adding to your list, with space for up to five list items.
If you want your list to continue onto the next slide, we recommend using the bulleted list format, as the numbers reset to 1 on each slide.
To delete a line on the Web App, simply click the circle with the white x in it to the right side of the list item.
Multiline and Header/Subheader Slides
If you'd like to make a statement without a logo or write a small paragraph on your slide, the header / subheader and multiline slides are for you. Simply choose whichever works for you, type your text, and then head to the layouts tool to choose how your text is arranged on the slide.
Adding More Text
If the text that you want to include on your slide isn’t fitting as well as you’d like, even on a multiline slide (see slide three in the example above), or you really want to include a long paragraph of text, don’t fret - just put that text in your public Notes.
Changing Font Color
Currently, you can change the color of your words on each slide from black to white or white to black. To do this, use the buttons that appear whenever the keyboard pops up on the iPad, or from the Web App in the background tool.

On the web:


Disabling auto capitalization on the iPad
If you'd like to use more lowercase letters than the app allows by default, simply go to the Main Menu, tap the gear in the bottom right corner, and turn the toggle for Auto Capitalization off.
More Resources
- Continue to Text 2: Layouts
- FAQ: Changing Your Font
- Troubleshoot: "PROOFREAD" Appearing on Slides in the Web App
- Presentation Ideas: One Idea Per Slide
- How to Create a Captivating Presentation
- Turn Presentations into Content Assets with Public Notes
- Text & Notes FAQ / Troubleshooting
 |
 |
 |

0 Comments