If you're brand new to Haiku Deck, start by getting oriented with this 3 minute video. Though the video is geared towards the iPad app and Web app, the functions are the same across all. After you've watched the video, scroll down for more iPhone specific information.
Entering Edit Mode
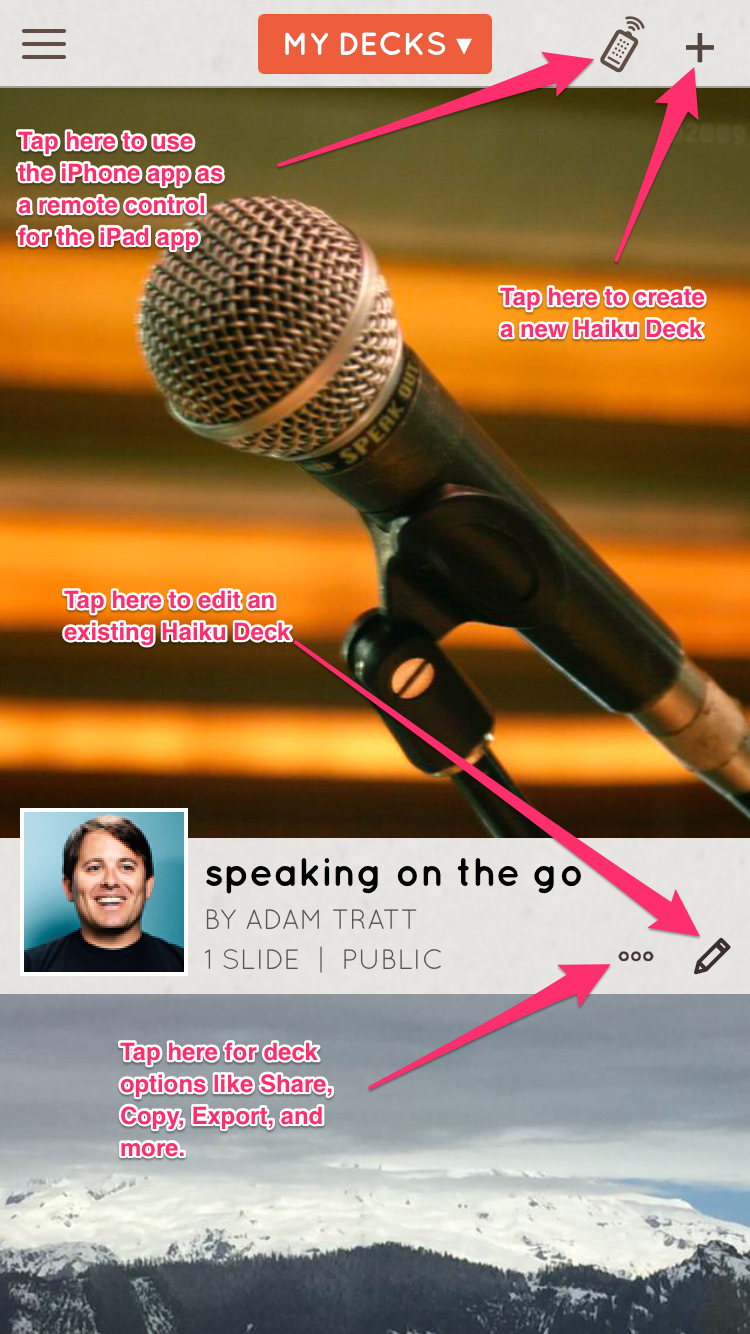
If you’re creating a new deck, first tap the "+" button in the top right corner of the Haiku Deck for iPhone main screen. You’ll enter Edit Mode automatically once you give your deck a title and tap RETURN.
To edit an existing deck on iPhone, simply tap the pencil icon below it to get started.
Choosing a Different Font/Theme
Once you enter the editor, at the top of your screen, you’ll see the Fonts/THEME handle. Pull it down and swipe left or right to scroll through the 20 font and theme options, then tap to apply a theme. Each theme gives your deck a unique look through font, text size, and color palette, as well as an optional image filter you can adjust with the toggle at the top of the theme drawer.

Creating Slides
To create your first slide, just tap and start typing your text. Use the “+” in the lower right corner to add a new slide. Above the slide tray, you’ll see a panel with four icons you can use to add and edit text, images, slide layouts, and notes.

Adding Text
Heading to the Tt icon will allow you to choose which type of text you’d like to have on your slide. After you tap the red Tt icon, swipe left and right to see the full range of options as shown below.
- a header and sub-header,
- a numbered list,
- a bulleted list,
- multiple lines of text,
- a header slide with a logo on it, or
- a split slide with text on a solid background and an image.

Adding a Chart or Image
Tap the blue IMAGE icon to search for an image, import one of your own, create a chart, or select a solid color background. On iPhone you have to scroll down to see some of the advanced image placement options. Pinch and drag to resize/reposition your images. The text background toggle will help make the text appear better on a low contrast background.

For a deep dive on how to make the most of Haiku Decks image search, charts, and infographics, watch this short video.
Adjusting Layout
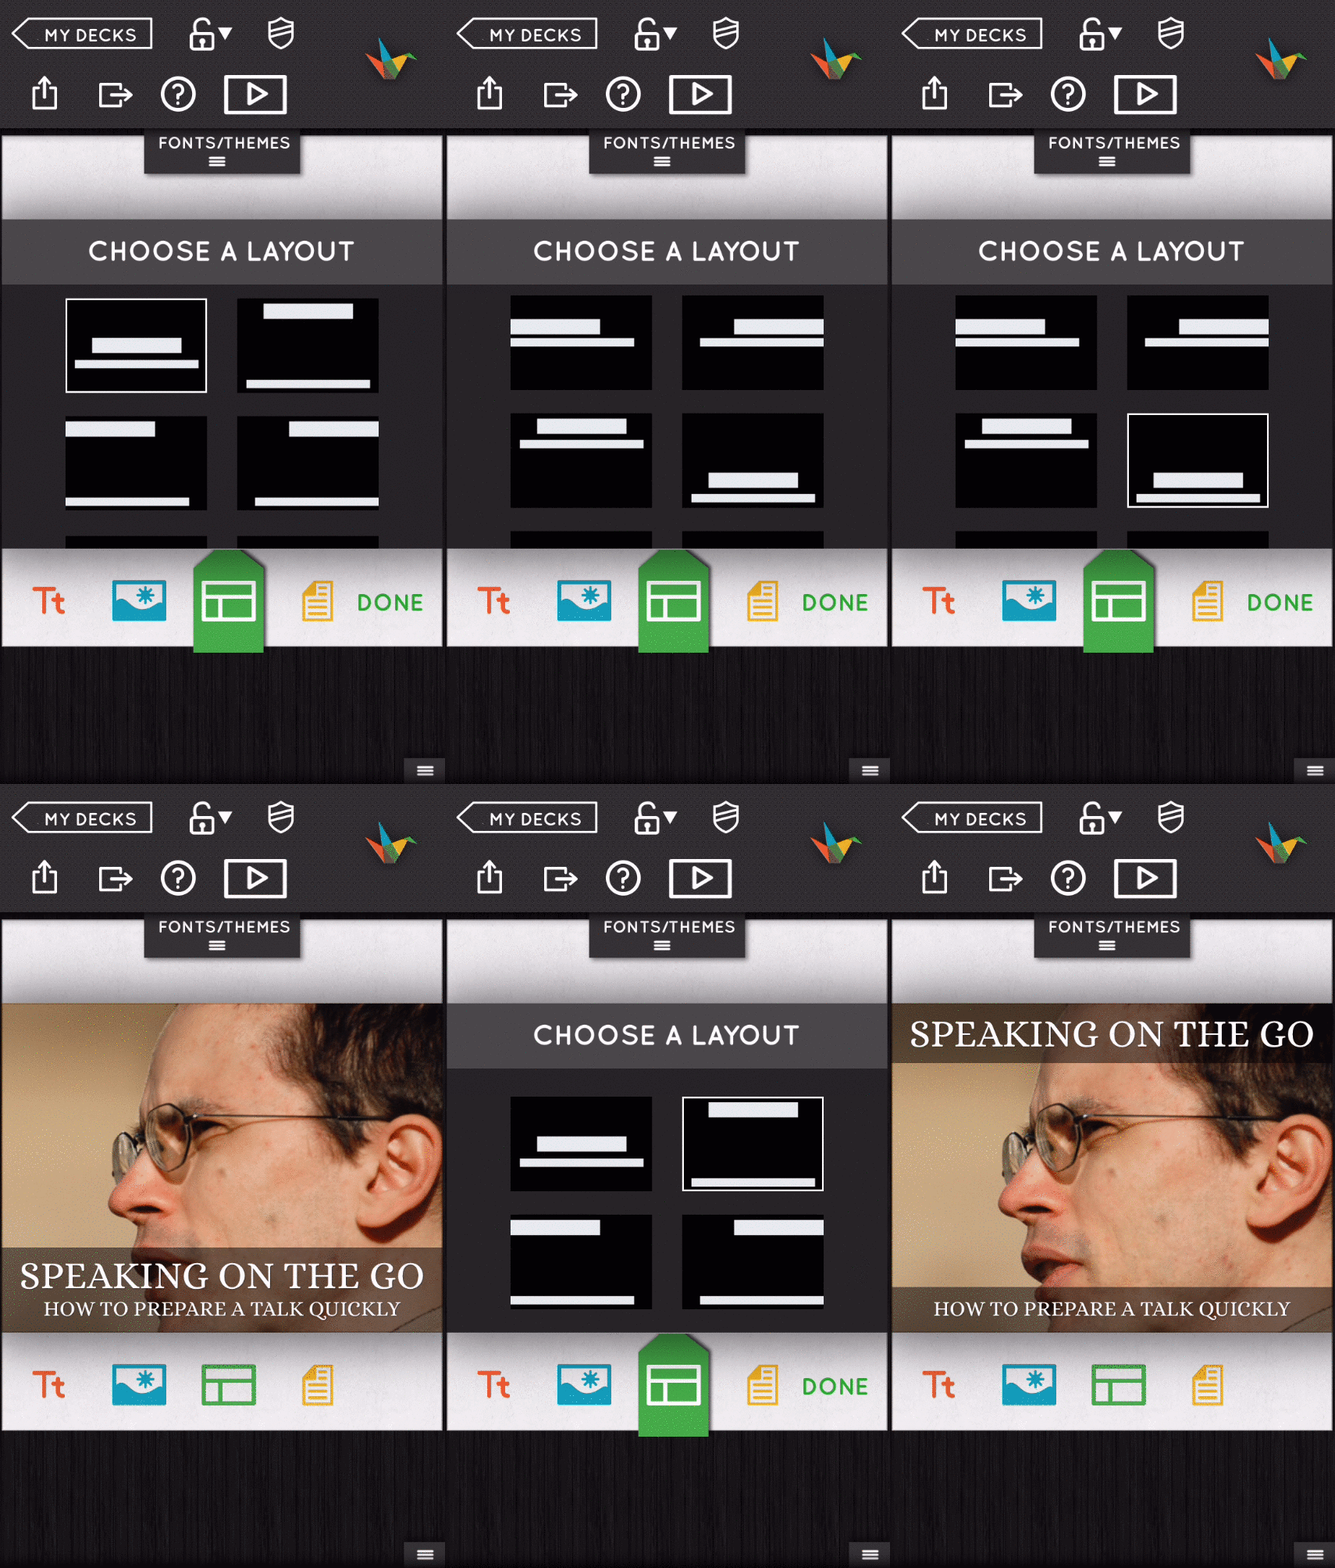
Tap the green LAYOUT icon to adjust how your text will be arranged on the slide. Note that the layout options vary based on the slide type you've chose under the red Tt button.
Adding Notes
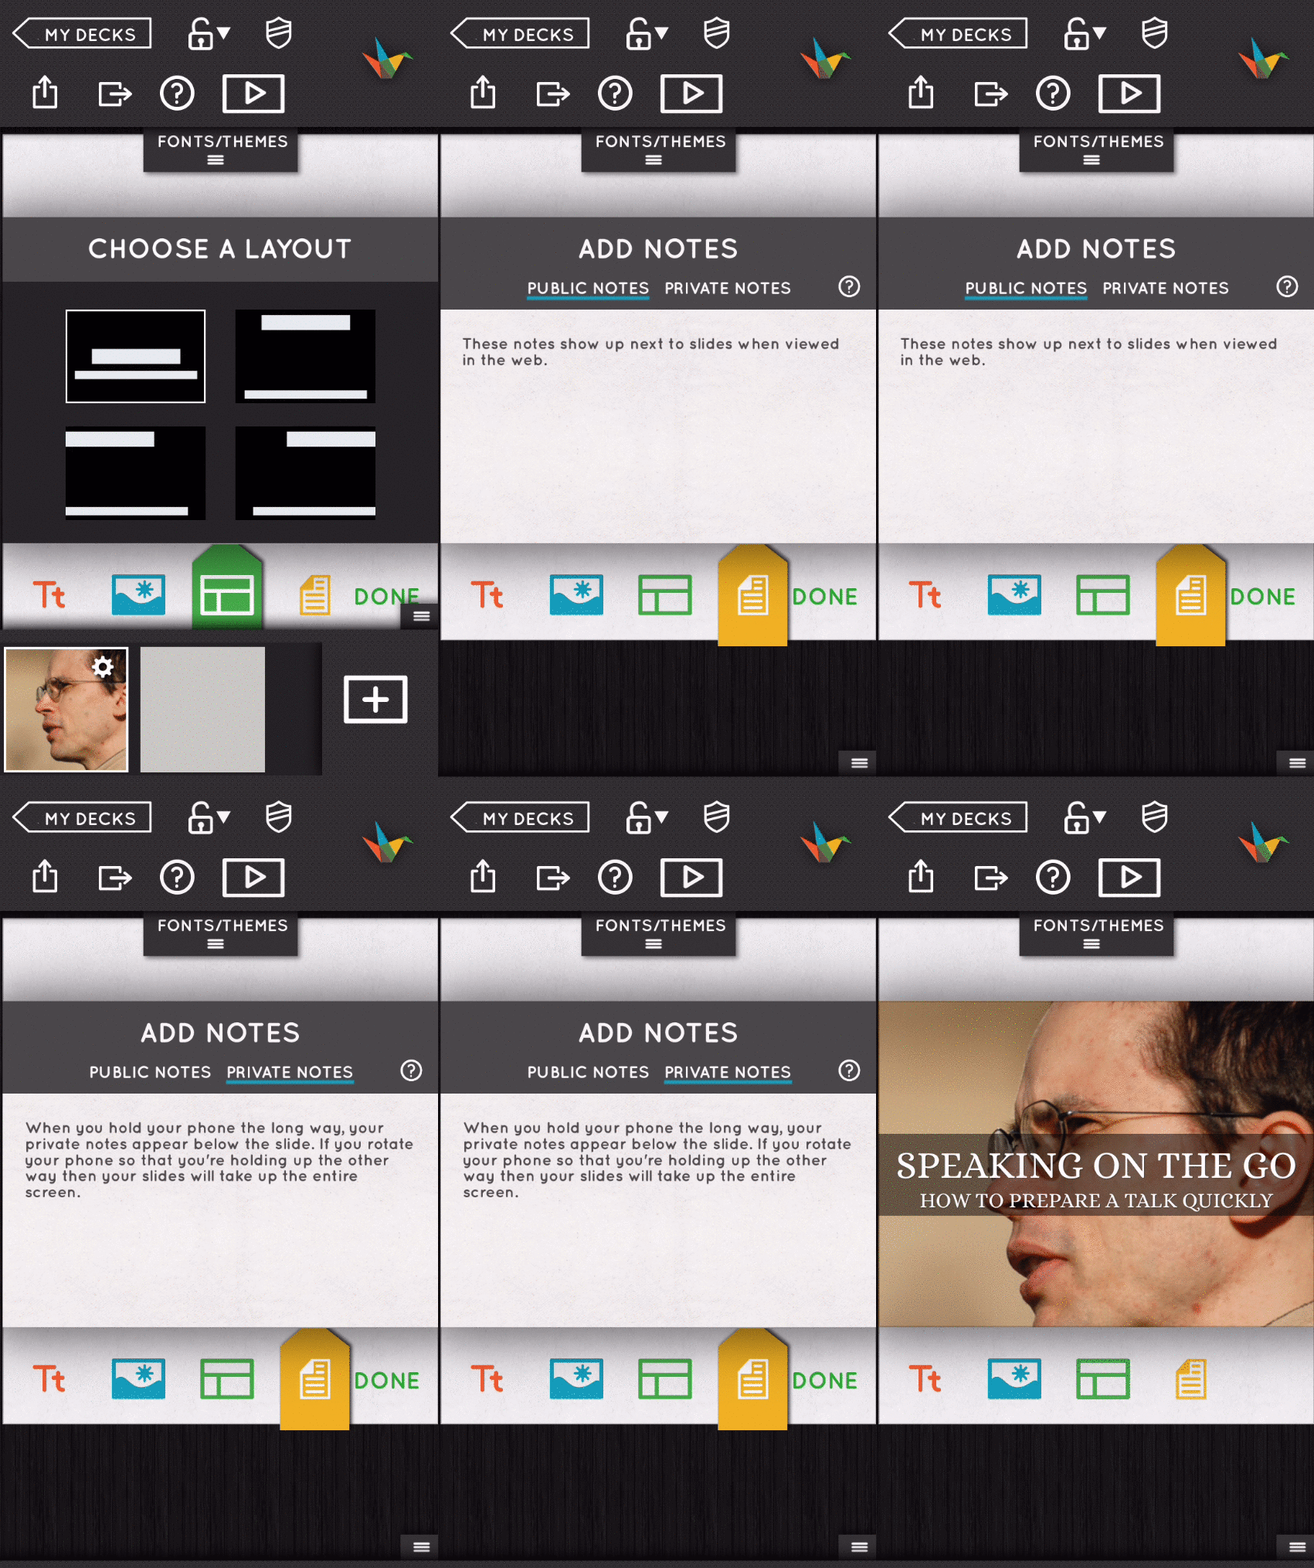
Tap the yellow NOTES icon to add private notes you can use as a personal teleprompter, or public notes to supplement the web view of your deck with additional detail and supporting links. Keep in mind that there's a toggle between public and private notes at the top of the notes field. If you don't like to type on your phone, you may use the microphone on your keyboard to take advantage of our handy voice-to-text option for dictating your notes.
Working with and rearranging slides
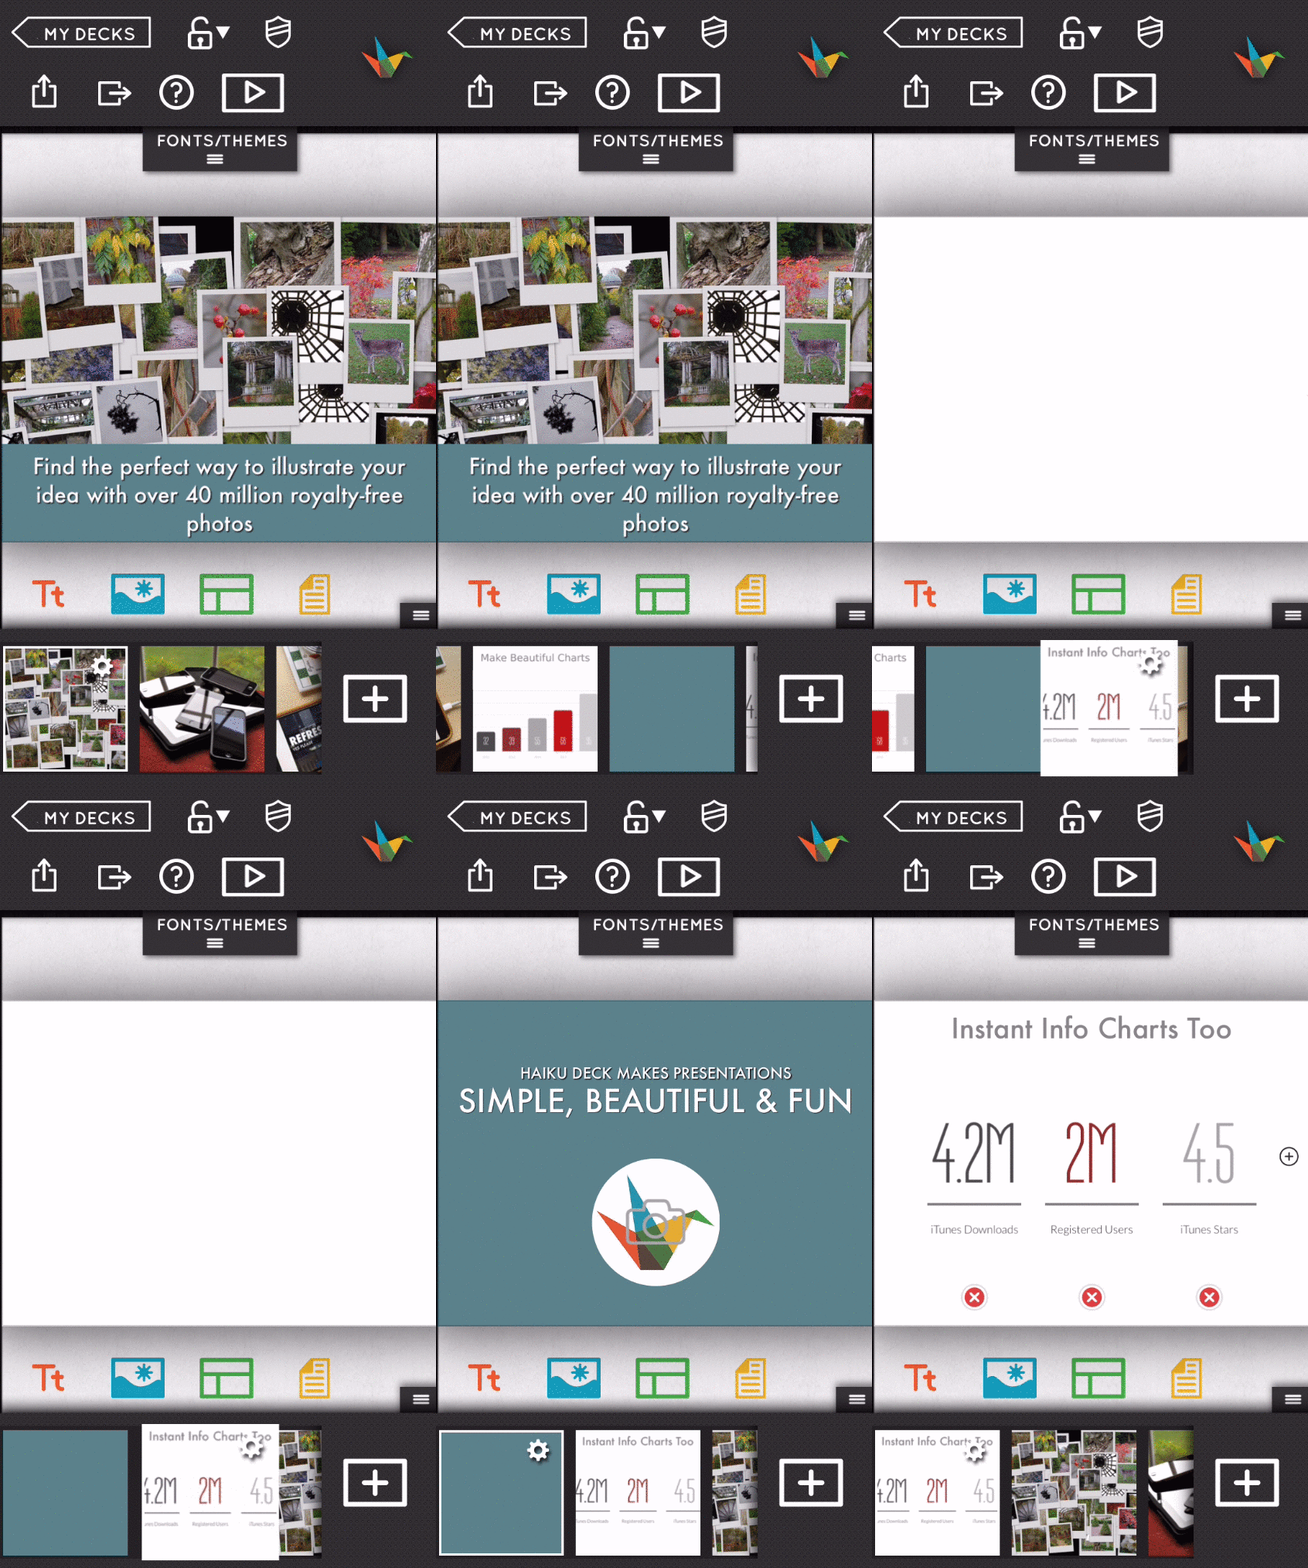
At the bottom of your screen is the Slide Tray, which displays all of your slides in the order they’ll appear in your final presentation. Swipe left and right to scroll through your slides. Use the button on the left side of the slide tray to hide/reveal your slides. To change the order of your slides, just tap/hold and drag to the spot you want. This is shown below.
Copying and Deleting Slides
To delete a slide, tap the gear in the top right corner of the slide in the slide tray, then DELETE. To copy a slide, tap the gear in the top right corner of a slide in the slide tray and then choose COPY. You can see this gear in the illustration above.
Viewing Your Deck
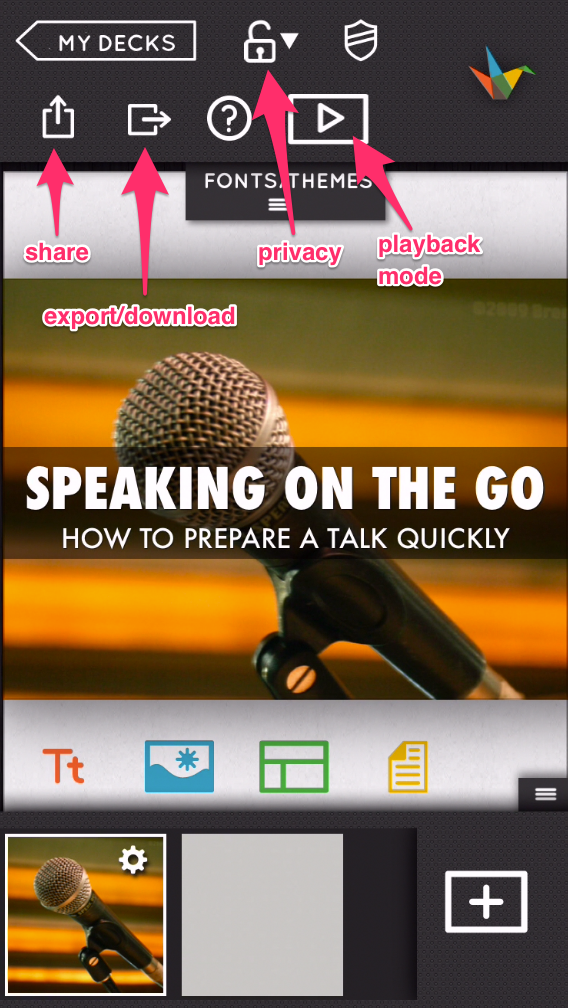
To preview your final deck, tap the PLAY button. It's the one with the triangle on it. Swipe right or left to advance your slides or go back.
Privacy Options
All Haiku Decks are publicly shared by default. To change privacy settings on your Haiku Decks, click the lock icon in the top center. Note that all Haiku Decks are public by default. If you wish to make decks private so that they remain invisible to search engines or prying eyes, you may do so as a Haiku Deck Pro subscriber. More on privacy settings here.
Downloading/Exporting Presentations
To download decks, look for the export (box with arrow pointing to the right). This is a paid feature available to subscribers of Haiku Deck Pro. When you export a file from Haiku Deck for iPhone, it opens your email application and places the exported file (.pdf or .pptx) as an attachment to an email. More on export functionality here.
Saving and Sharing
Your slides will be saved to your iPhone automatically as you work, but we recommend saving your work to the web as well to make your deck viewable from any web-enabled device. When you’re all set, use the EXPORT or SHARE buttons, tap the play button in the top right, or return to the Main Menu from the top left — doing any of those will prompt Haiku Deck to sync with your account on haikudeck.com.
Once you’ve mastered the basics of editing, check out our power tips for image searching, resizing and positioning images, incorporating video, or making lists. And if you need some inspiration, take a spin through our Featured and Popular Galleries.(Tip: You can also tap GALLERY right from the Main Screen in the app!)
Once you have a gallery-ready Haiku Deck of your own, be sure to email it to gallery@haikudeck.com, or tweet it with the hashtag #hdgallery.
Now….time to set your story free!
0 Comments